Thursday, May 17, 2007

Deadwood and stem facing

To complete the deadwood required a 1 inch think plank about 7 inches wide and 12 foot long. This wouldn't have been a problem back in Auckland but being new to Melbourne it took a while to find a timber merchant that had Fijian Kauri. Eventually I found a great one that had all sorts of exotic woods. Very exciting for a boat builder, maybe a bit boring for others.

The deadwood was very easy to shape and attach to the boat, however it did expose a problem with the flat I had planned along the keel earlier. It wasn't quite straight near the stern which required a bit of filling.


The stem facing went on great. When I planned it down to the lines as per the plan it lined up beautiful with the planks. It ones of those parts of the boat that people cannot help touching when they see it.

Planking, planking, more planking


Well I haven't posted in a while but as you will see I have been busy. Busy planking that is. I must say that after a while this gets very boring but its good to see the boat growing.

Cleaning up excess glue is a painful job but now I've turned her over I appreciate the time taken to remove most of it while wet.


The scarfe joints have gone together well. They look better on the inside than the outside so its is good I am not finishing bright on the outside.
Here are a few more shots of the planking as it progresses.

Tuesday, October 24, 2006

First Plank


The time has arrived to start planking! Here is the first plank going on the boat which was quite exciting as once I get through this stage I will have something that will float (hopefully).


The process went without a problem in the end and the plank pulled down quite well. The twist at the front is quite extreme so I took it slowly and ensured that it was supported with a clamp as I was concerned that the pressure on the end screw might pull it through the plywood.


Here is a shot from the inside of the forefoot. As you can see the plank pulls down well on the keel bevel and creates the illusion of the keel sinking into the plank.

The part that concerned me the most was the scarf joint. I will have few more pictures of this in the next post.

Lessons learnt from this stage would be to watch where you put the screws at the keel. This is a fine line between getting them too close to the side of the keel and going right through and having them too close to the center and ending up with them interfering with the bevel for the other garboard plank and the flat for the deadwood.

In the end mine where to close to the centre so I removed all of the screws that where going to cause a problem. Luckily I discovered this about 18 hours after gluing on the plank so I could remove the screws before the epoxy held them for good. At this stage I don’t think I will replace them as I can’t see them adding that much to the strength of the joint. I will check this with Arch and see what he thinks.

Thursday, October 19, 2006

Stem Facing


To create the laminations I used by table saw to split ¾ inch boards into three parts. These needed planning down by hand to remove variations created by cuts made from both sides of the boards. This was not my preferred method of creating the laminations but I had to work to the limitations of the tools at hand.

Ideally I would have split the boards down the center on the table saw and then brought them down to size with a thicknesser.

As you can see the gluing up of the stem facing is not a task you want to attack without a good supply of clamps.

Slight Diversion


Ok the mess in the workshop got to me so I spent some time making a peg board and shelves to house some of the tools. I got the ideas from the Woodsmith series of books.

Anyway I had to do a bit of thinking how I would make the laminations for the stem facing as my first attempt using my bandsaw was disaster.

Keel Bevel


Here are a couple photos showing the keel beveled to take the first plank. The instructions call for a process to mark the location of the bevel that works well where you make the side of the keel but I found the area near the transom, where the line runs from the edge to the top of the keel, near impossible. In the end I decided just to take it carefully rather than rely on the lines.

To help spot the high points on the keel I used a file across the bottom stringer to the keel. This automatically marks the high spots on the keel and allows you to knock these off with your plane.


Stringers


Finally all of the stringers on the frames. All in all I only shifted 1 stringer about 1/8 of inch off its mark on one frame. I have checked from all angles but they all look good to me so I have to congratulate Arch for his good drawings and his insistence on being fussy in building the frames and setting up.


Personally I found getting the stringers through the transom more difficult than getting them to sit on the stem correctly. However the most important part of the transom is the inboard side so you can get away with it being a bit rough on the exit because this will be covered by the ply on the outboard side.

My advice for the bottom stringers at the stem would be not to try and get to much twist on them. While you might be able to hold this with a clamp it is unlikely to hold with a single screw.

Friday, October 06, 2006

A Fresh Start


Well putting the parts back together has gone a lot quicker than I thought it would. I sourced some good pine for the building jig from the local hardware store and used some laser levels to get it nice and level.

I was a bit concerned when I ripped the sheers and stringers from my nice straight peice of wood as the tension trapped within the wood bent them into all sorts of shapes. However in the end this did not make a difference as they still formed fair curves as they were bent onto the frames.

Now if you think this boat is taking a while to build, the model boat behind me has been on the go for twelve years.

After fixing the sheers I then added the top two stringers before attacking the more difficult bottom stringer. However the process explained in the instruction manual all made sense when put into practise and I quite satisfied with the result.

Over the Ditch


After the last New Zealand general election in November 2005 we decided that we would shift out of New Zealand and experience something different. So this put a stop to the boat building as we made plans to relocate somewhere in the world.

In the end we decided to shift to Melbourne Australia and so plans were made, a new job found and we were off, shifting over in March 2007.

After settling into a new house the boat was started over again. Thankfully I was able to bring over the temporary frames, the Fijian kauri, and the stem and transom.

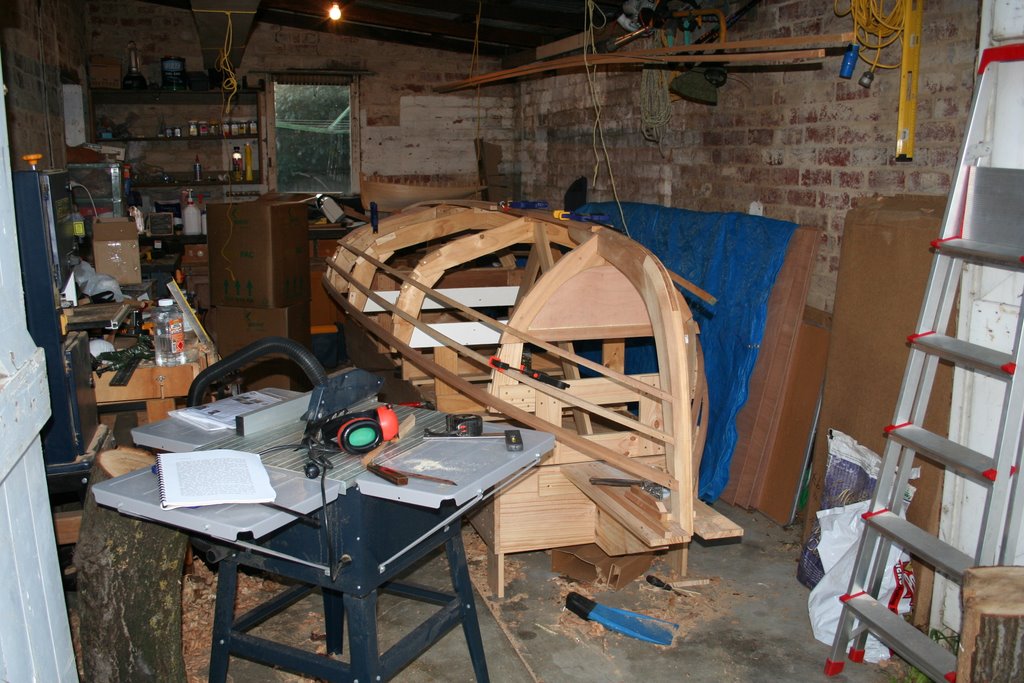
Unfortunately the garage at the new house (below) is only about six meters long and three meters wide. Not the luxury of my last one (above) but it not going to stop me.

Friday, April 01, 2005

And we're off

I have found a good source of wood locally at a supplier called Timpan. I have selected some Fijian Kauri for the keel, framing, stem and stringers that is away getting dressed. I have decided to use this Kauri for everything but the rub rails and rail cap. I have seen a number of these boats built will lots of wood varieties together and they just look awful. So I have decided to keep it simple.

I have also managed to replace my band saw with an old tanner that I bought through Trademe. This one is a decent size with a 350mm throat so should be a lot better than the old one.

Over Easter I built the jig for the boat so I will be ready to stand up the temporary frames this weekend. Once I have my kauri the boat should move along quite quickly which should be quite satisfying after such a slow start.

Sunday, January 09, 2005

Rope Stropped Wooden Blocks

Here's a picture of some blocks that I am hoping mine will look like.

Pregnant Pause

I haven't done much on the boat lately as I spent December working on the boys Christmas present, a toy castle, and my bandsaw has broken down. The later should not cost much to fix if I can just find the parts to do it.

I have occupied most of this time by doing research on making blocks and sails. I got a great book for Christmas called "The Marlinespike Sailor" that has full plans on how to make rope stropped wooden blocks. This has sent me on a search of the local chandleries to find marline and other bits and pieces. In the end I have found a source of pine tar locally and will make my own. I still think I will have some trouble sourcing the bronze sheaves locally though.

Last night I discovered Sailrite. They actually make sails for the Penobscot 14. You can buy these made up or as a kit you finish yourself. I still haven't decided what I will do on this one yet but at least I have some options open. I was a bit concerned that I would get to the end and this would cause me problems.

So as far as actual building goes I have still only got three temporary frames completed! The next task is to fix the bandsaw and start making the rest of the frames and stem. For this I will have to get some timber, which will have to wait until we a bit more flush with money.

Tuesday, November 16, 2004

Plans have arrived!

"Forgive me Farther for it has been some time since my last blog".

The plans arrived about a month ago along with the video. The plans and building instructions are really good and I have read through them a few times now. However I had a bit of trouble with the video as it was in NTSC format, as expected, but my VCR would not play it despite what the manual said it would do. So I had to get it converted for $50!

The video is amateur in its quality but excellent in its content. Each stage of the process is covered very well with some good sailing shots at the end the give inspiration to get started.

I have started building the temporary frames using some 1m lengthe of 4x1 that I picked up at the Building Depot. I got enough to build the frames and other temporary jobs for $15 as they were going out of business. This was 25% of usual. So far I have two of the temporary frames built. I have also started on the paterns with a sheet of 6mm ply I bought for $34 from ITM.

Saturday, October 02, 2004


Penobscot 14 Posted by Hello

Study Pack Arrived!

Came back from rugby this afternoon to find an A4 size envelope in the mailbox, the kind that you can just tell is international. Sure enough it was from Arch Davies but obviously not the whole nine yards in a package so small. Sure enough this was only the Study Pack and I am still waiting on the plans and video.

This was quite a good document with details about the boat, information on pre-built parts that you can buy and the typical ply and epoxy packs. The information in the pack was very similar to the information in the magazines that I have so it was very much an entree that left we hungry for more. It did have a good set of drawings on a single sheet of the boat.

It was good to see the prices to try and gauge the cost of the total boat build. As an example you can get a pack of 5 sheets of 6mm ply for USD$260. I priced this locally for about NZD$275 (conversion is USD$0.67 to an NZ dollar) so this is much cheaper here. My best guess here is that it will cost about NZD$3000 all up to build the boat, get the sails made and the parts for the rigging.

Anyway I hope that this is a signal that the rest is not to far away.

Wednesday, September 29, 2004

Reference

Just thought I would post the link to Arch Davies site so you could see what the boat should look like when finished.

Penobscot 14

If you click on this link News, Stories & Photos you will see a few examples of other people efforts.

Tuesday, September 28, 2004

Getting started

Well its all underway now. I checked the credit card and there is an entry there from Arch Davies Boat Designs indicating that the fax has been received and the plans are on their way. $260 including postage for the plans, a study pack, and a two hour video on how to build the boat and boat building techniques.

I got the family to help clean out the garage over the weekend so that I now have plenty of space to start building. My wife was a bit surprised at the size of the boat when we measured it out on the floor of the garage. I must admit I was a bit surprised myself, 14 feet does not sound like much but it is a resonble size to for your first boat building experience.

I can't wait until the plans get here.